Personal Access Tokens
The Personal Access Tokens page is the management view for personal access tokens across your LLM Gateway deployment. Administrators can create new tokens for users and revoke them when necessary. End users see only their own tokens via the personal My Tokens page.
Role access: Super Admin and Admin can create and revoke tokens for any project. Project Manager can manage tokens for projects they own. Auditor has read-only access. User sees only their own tokens via My Tokens.
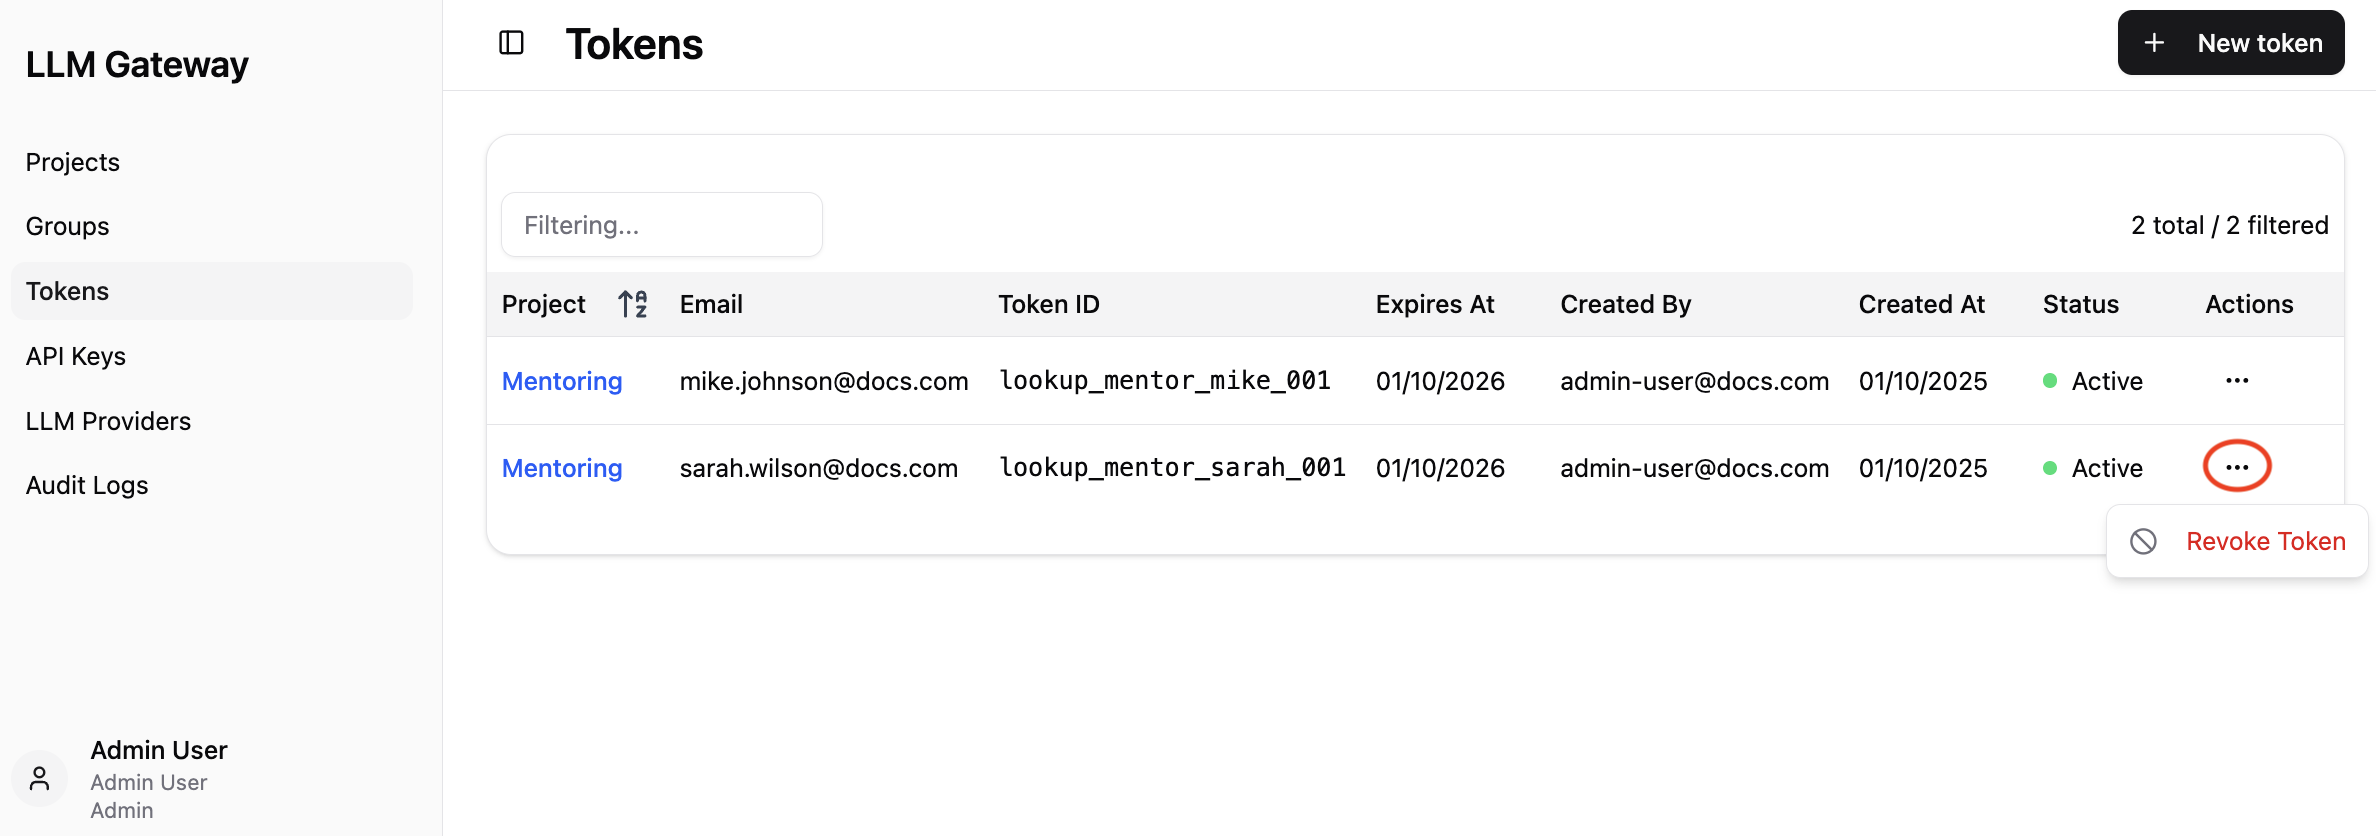
Note: After clicking the three-dot menu (highlighted by a red circle), you can revoke the token.
Dashboard Components
The main tokens table provides detailed information for each token:
-
Project - Associated project name and code,
-
Email - Email address of the token owner,
-
Token ID - Unique identifier for the token,
-
Expires At - Token expiration date,
-
Created By - Email address of the administrator who created the token,
-
Created At - Date when the token was created,
-
Status - Current token status (Active/Inactive) with green indicator for active tokens,
-
Actions - Three-dot menu providing access to token-specific operations such as revocation (highlighted in red circle).
Token Management Features
Creating New Tokens
- Click the
+ New tokenbutton in the top-right corner to create new tokens, - Configure user details and project assignment during the creation process,
- Tokens are automatically generated with secure random values.
Token Configuration
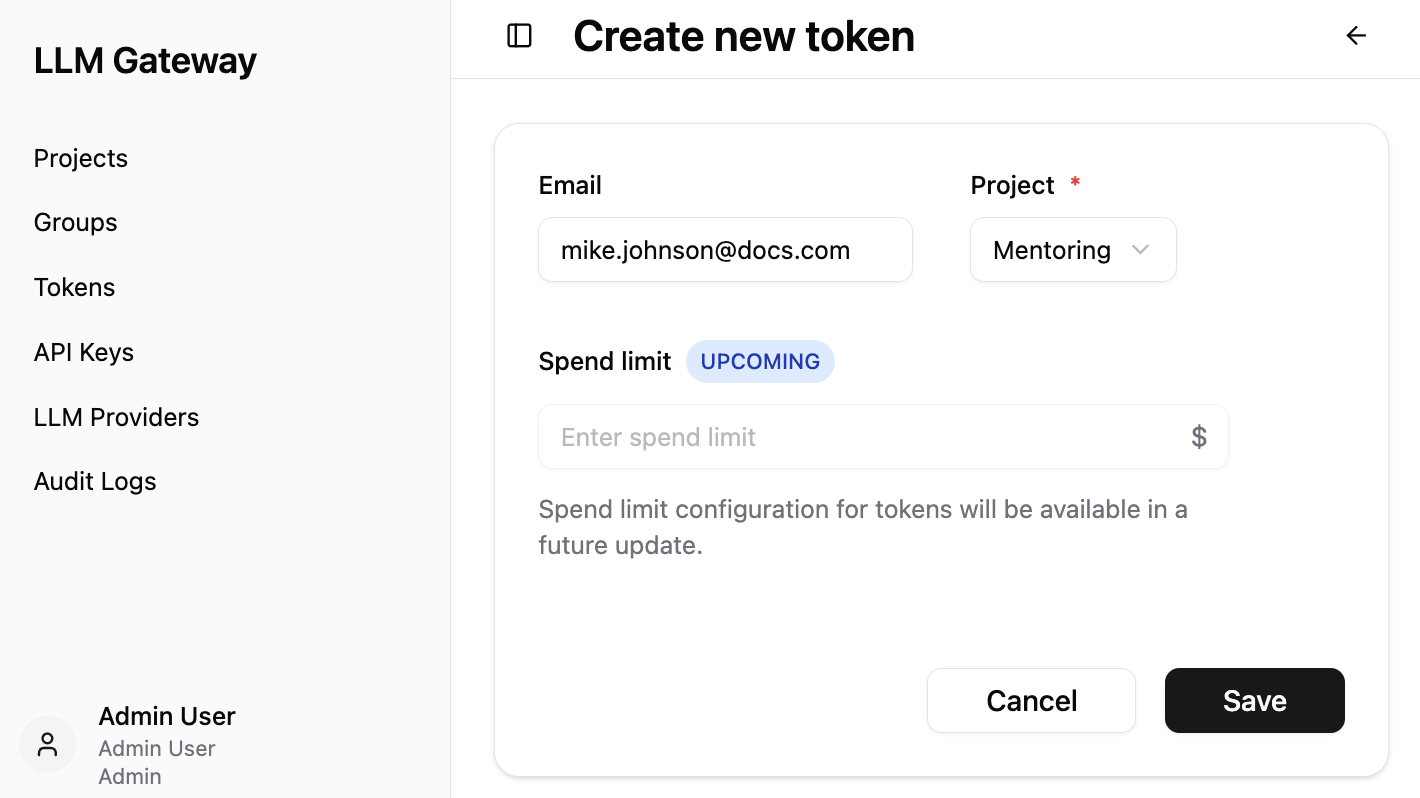
When creating a new token, you need to provide:
- Email - User's email address for token ownership,
- Project - Select from dropdown menu of available projects,
- Spend limit - Spend limit configuration.
Note: The Project field is required and must be selected from the dropdown menu. Spend limit configuration for tokens will be available in a future update.
Token Creation Success
After successful token creation, you will see a confirmation dialog with important security information:
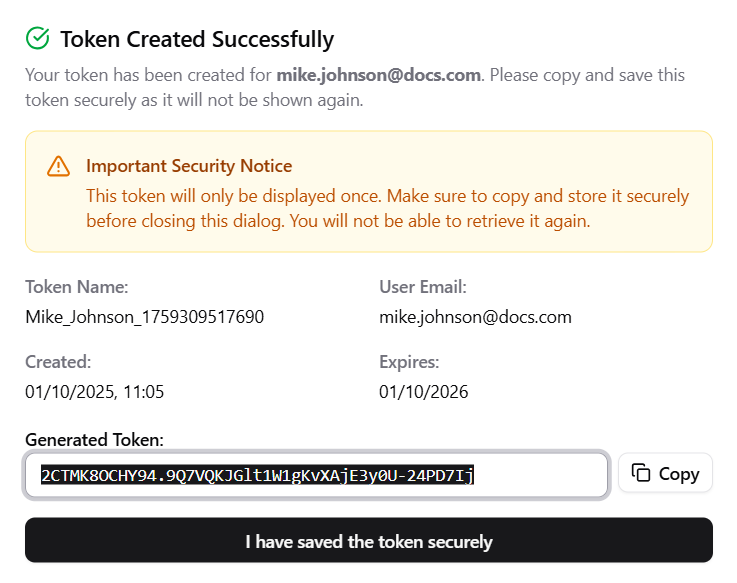
Important Security Notice: The generated token will only be displayed once. You must copy and store it securely before closing the dialog, as it cannot be retrieved again.
The success dialog shows:
- Token Name - Generated token name with timestamp,
- User Email - Associated user email address,
- Created - Token creation date and time,
- Expires - Token expiration date,
- Generated Token - The actual personal access token string with copy functionality.