Projects
The Projects page provides comprehensive management and oversight of all projects within your LLM Gateway deployment. This central hub allows administrators to monitor project activity, manage spending limits, create new projects, and access detailed project configurations.
Role access: Super Admin and Admin have full access. Project Manager can view and manage only projects they own. Auditor has read-only access to all projects. User has no access to this page.
On This Page
- Dashboard Components - Overview metrics and projects table
- Creating New Projects - How to create and configure new projects
- Project Management Tabs - Navigate to individual project settings:
- Tokens Tab - Manage user tokens
- API Keys Tab - Manage API keys
- Spend Limits Tab - Configure spending controls
- Models Tab - Control model access
- Audit Log Tab - View project activity logs
- Usage Tab - Review project-level spend and request volume
- Interaction Logging Tab - Override interaction logging for this project
Dashboard Components
Overview Metrics
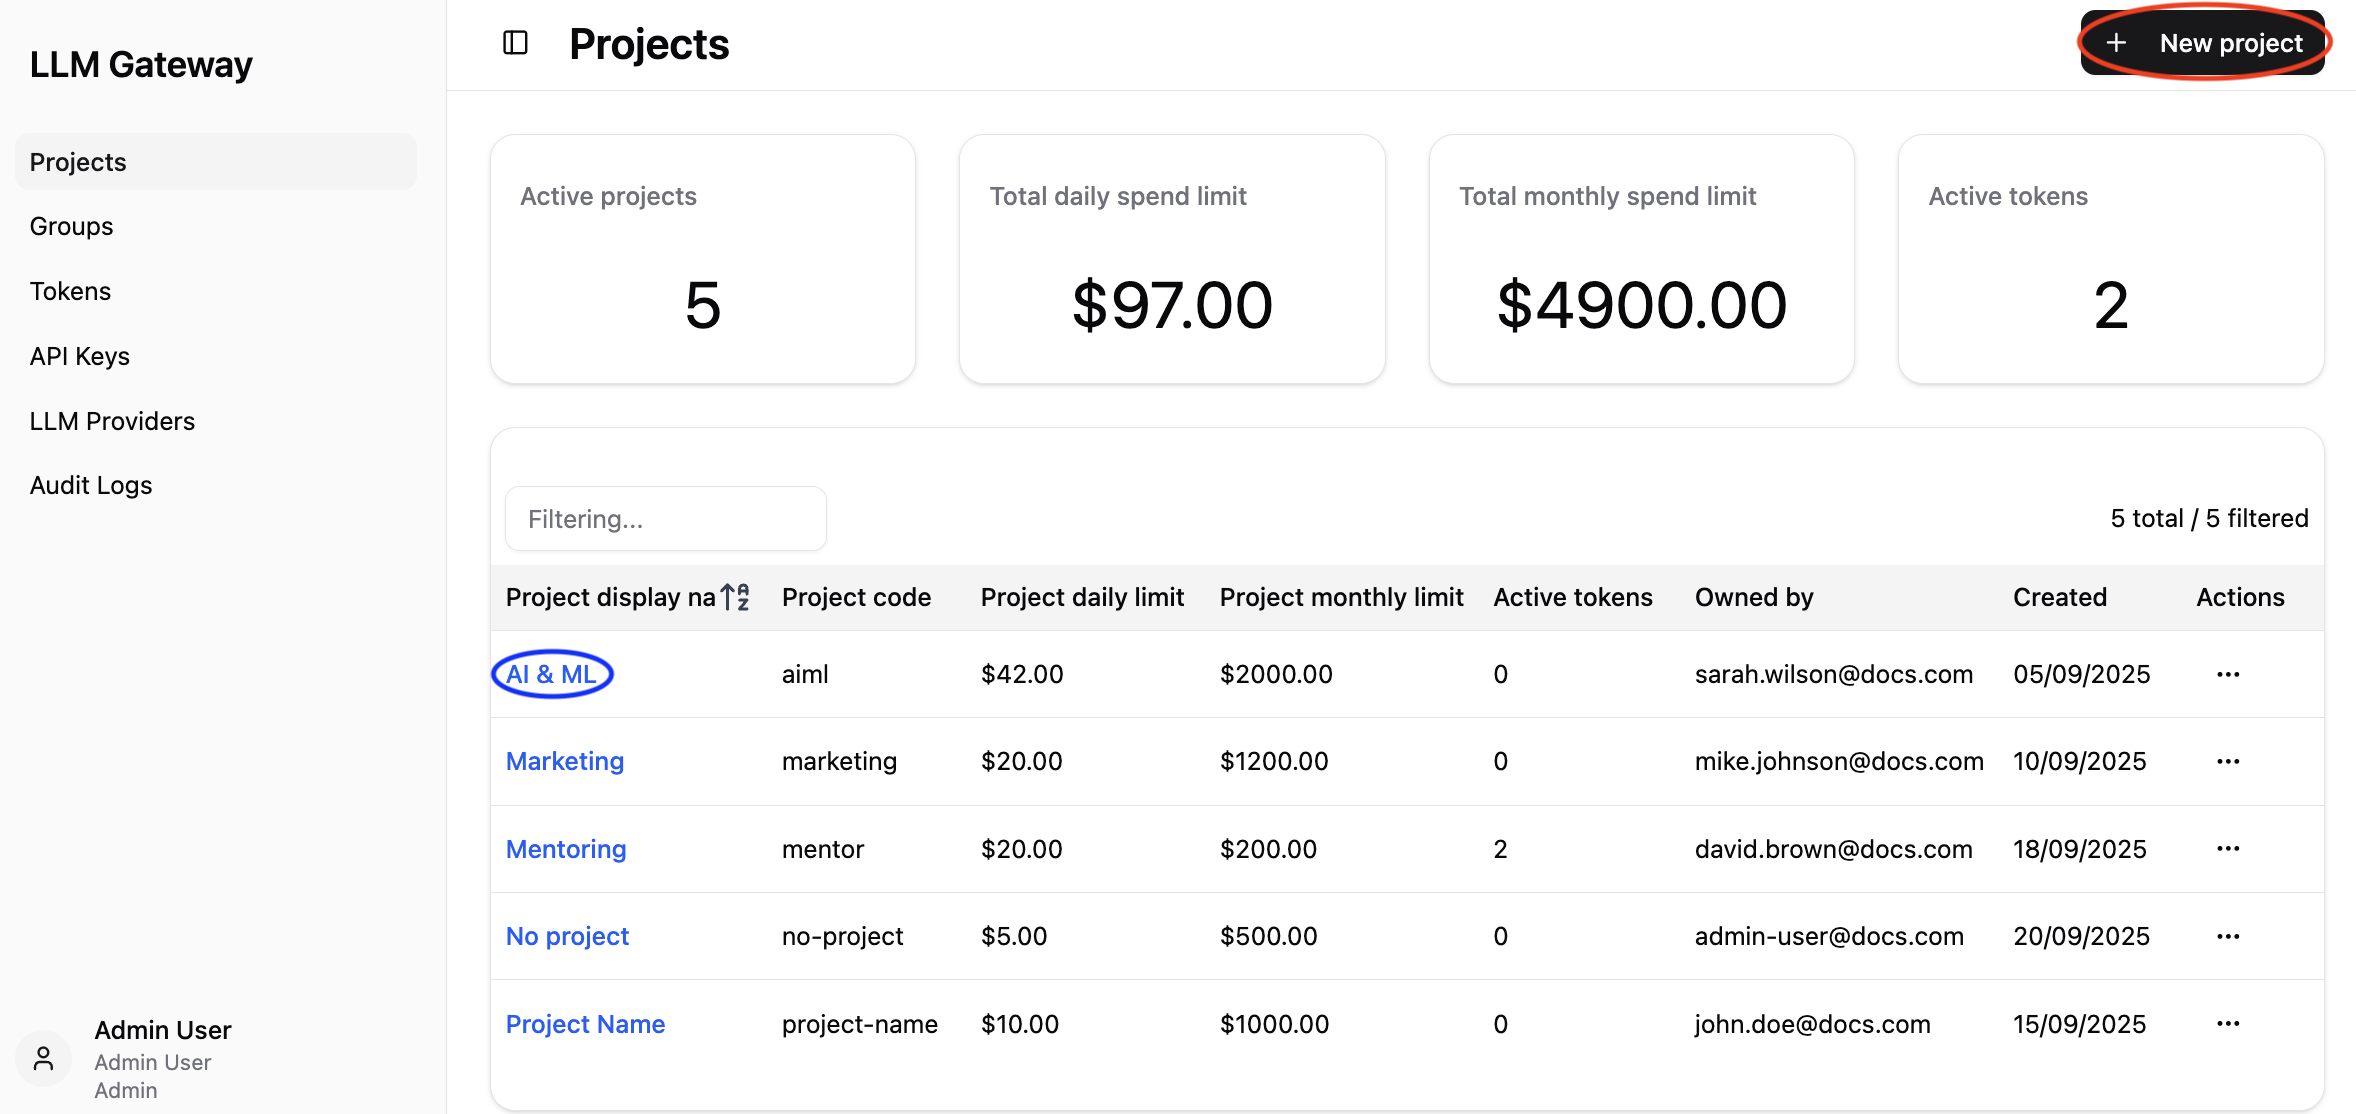
The dashboard displays four key metrics tiles providing a high-level summary:
-
Active projects - Shows the current number of active projects,
-
Total daily spend limit - Displays the aggregate daily spending limit across all projects,
-
Total monthly spend limit - Shows the cumulative monthly spending limit for all projects,
-
Active tokens - Number of currently active API tokens across all projects.
Projects Table
The main projects table provides detailed information for each project:
-
Project display name - Human-readable name for the project,
-
Project code - Unique identifier code for programmatic access,
-
Project daily limit - Daily spending limit configured for each project,
-
Project monthly limit - Monthly spending limit set for each project,
-
Active tokens - Number of active API tokens currently associated with the project,
-
Owned by - Email address of the project owner/administrator,
-
Created - Date when the project was created,
-
Actions - Three-dot menu providing access to project-specific operations such as deletion.
Project Management Features
Creating New Projects
Required role: Admin
- Click the
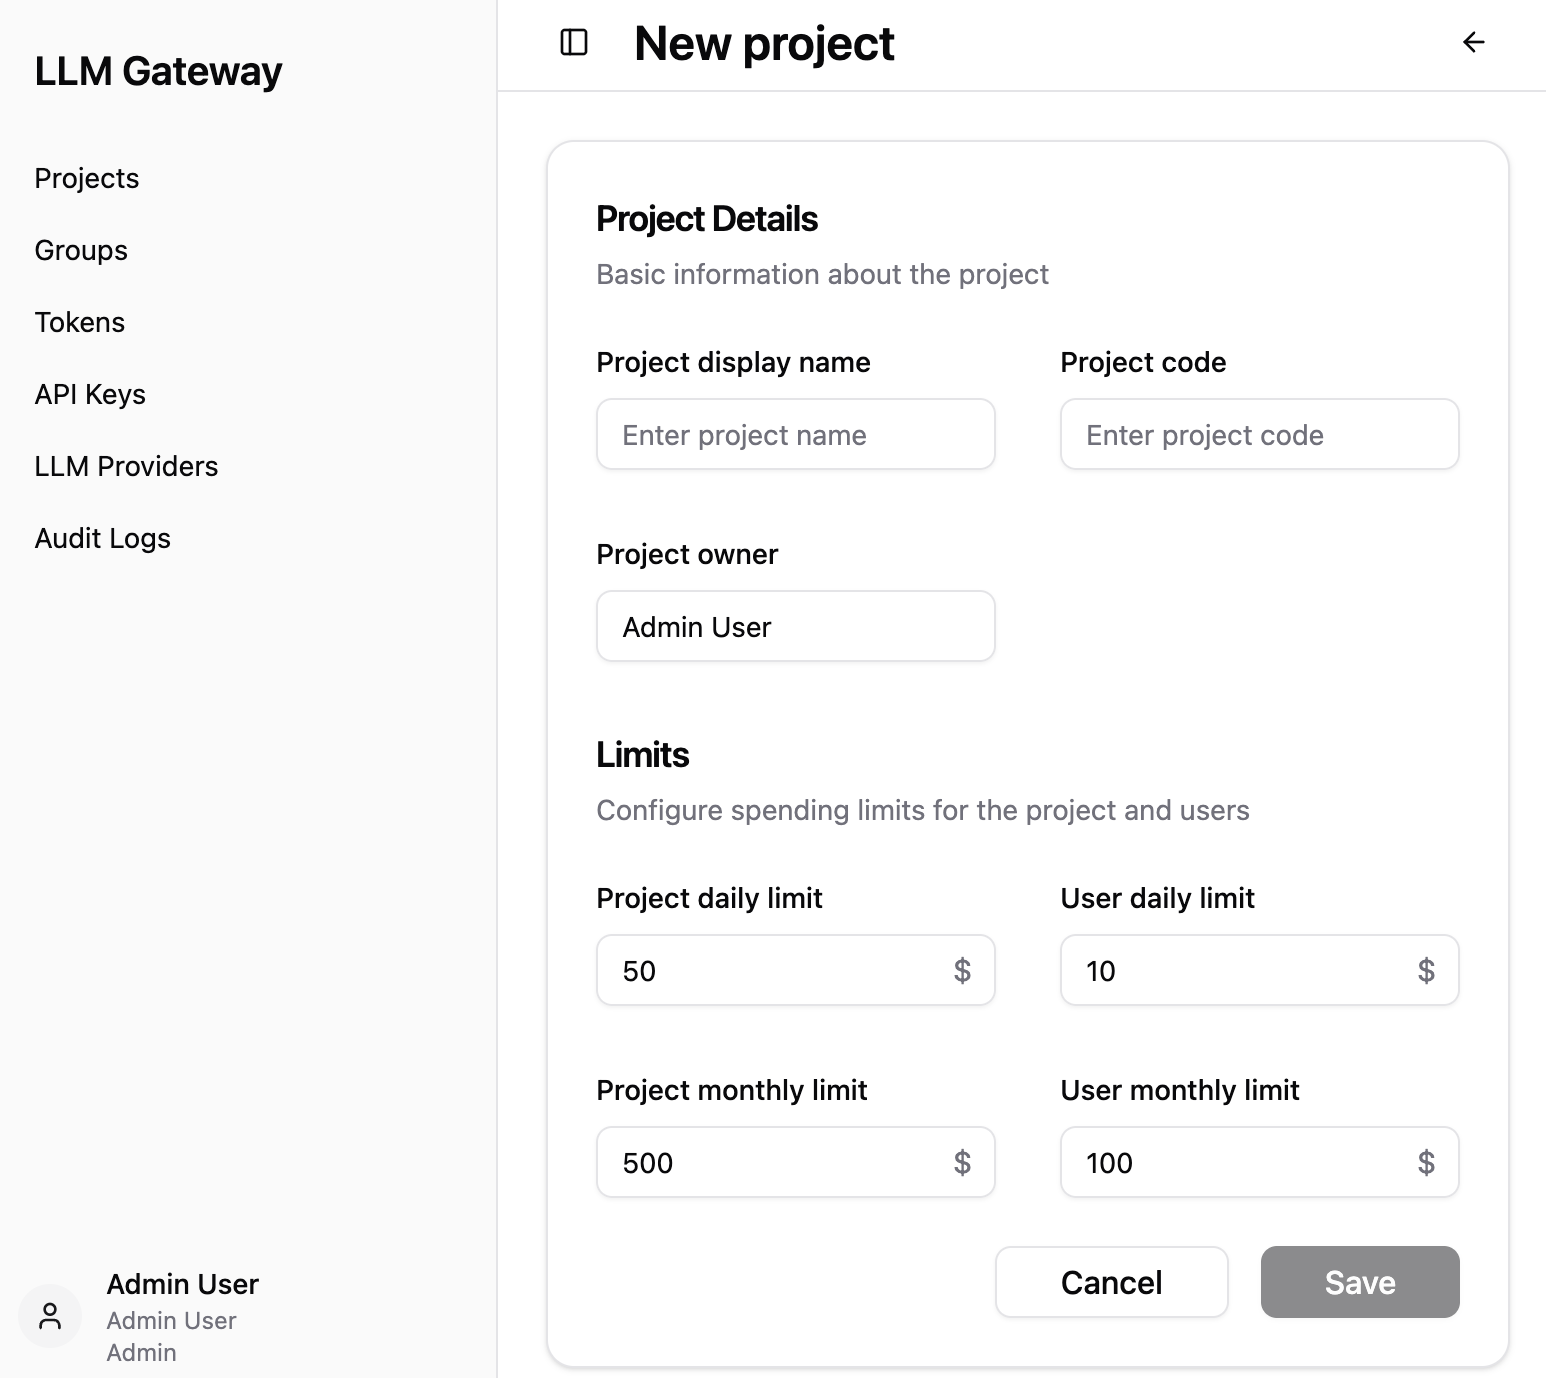
+ New projectbutton (highlighted by red circle in the image on top of the page) to create new projects, - Configure project name, code, project owner, and spend limits during the creation process,
- Set granular controls for both project-level and user-level spend limits.
Project Access and Navigation
- Click on any project name (highlighted by blue circle in the image on top of the page) to access detailed project settings,
- Navigate to individual project dashboards with main management tabs:
Tokens Tab
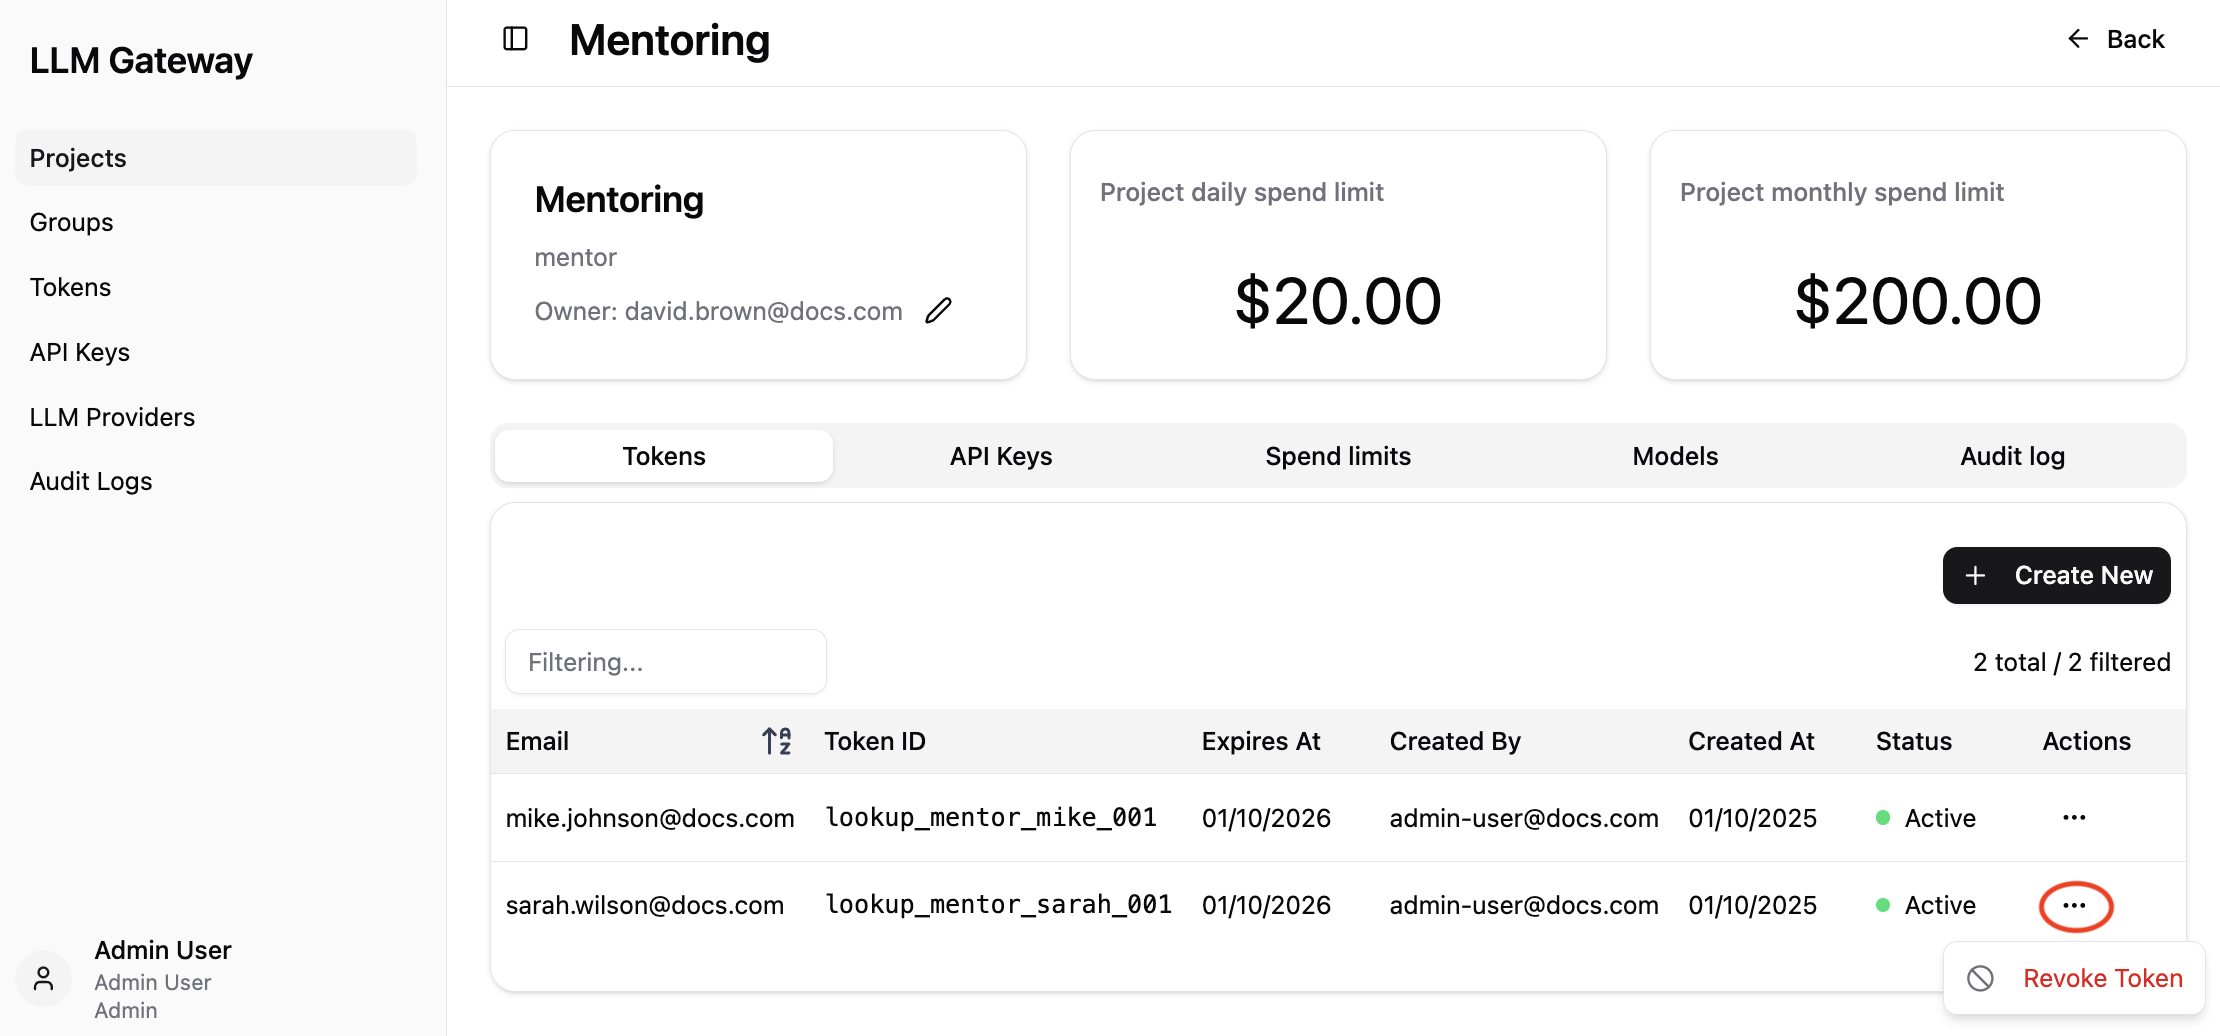
Monitor and manage all API tokens associated with the project:
- View comprehensive token details including names, IDs, and ownership,
- Track token status and expiration dates,
- Revoke tokens immediately for security purposes (highlighted in red circle).
API Keys Tab
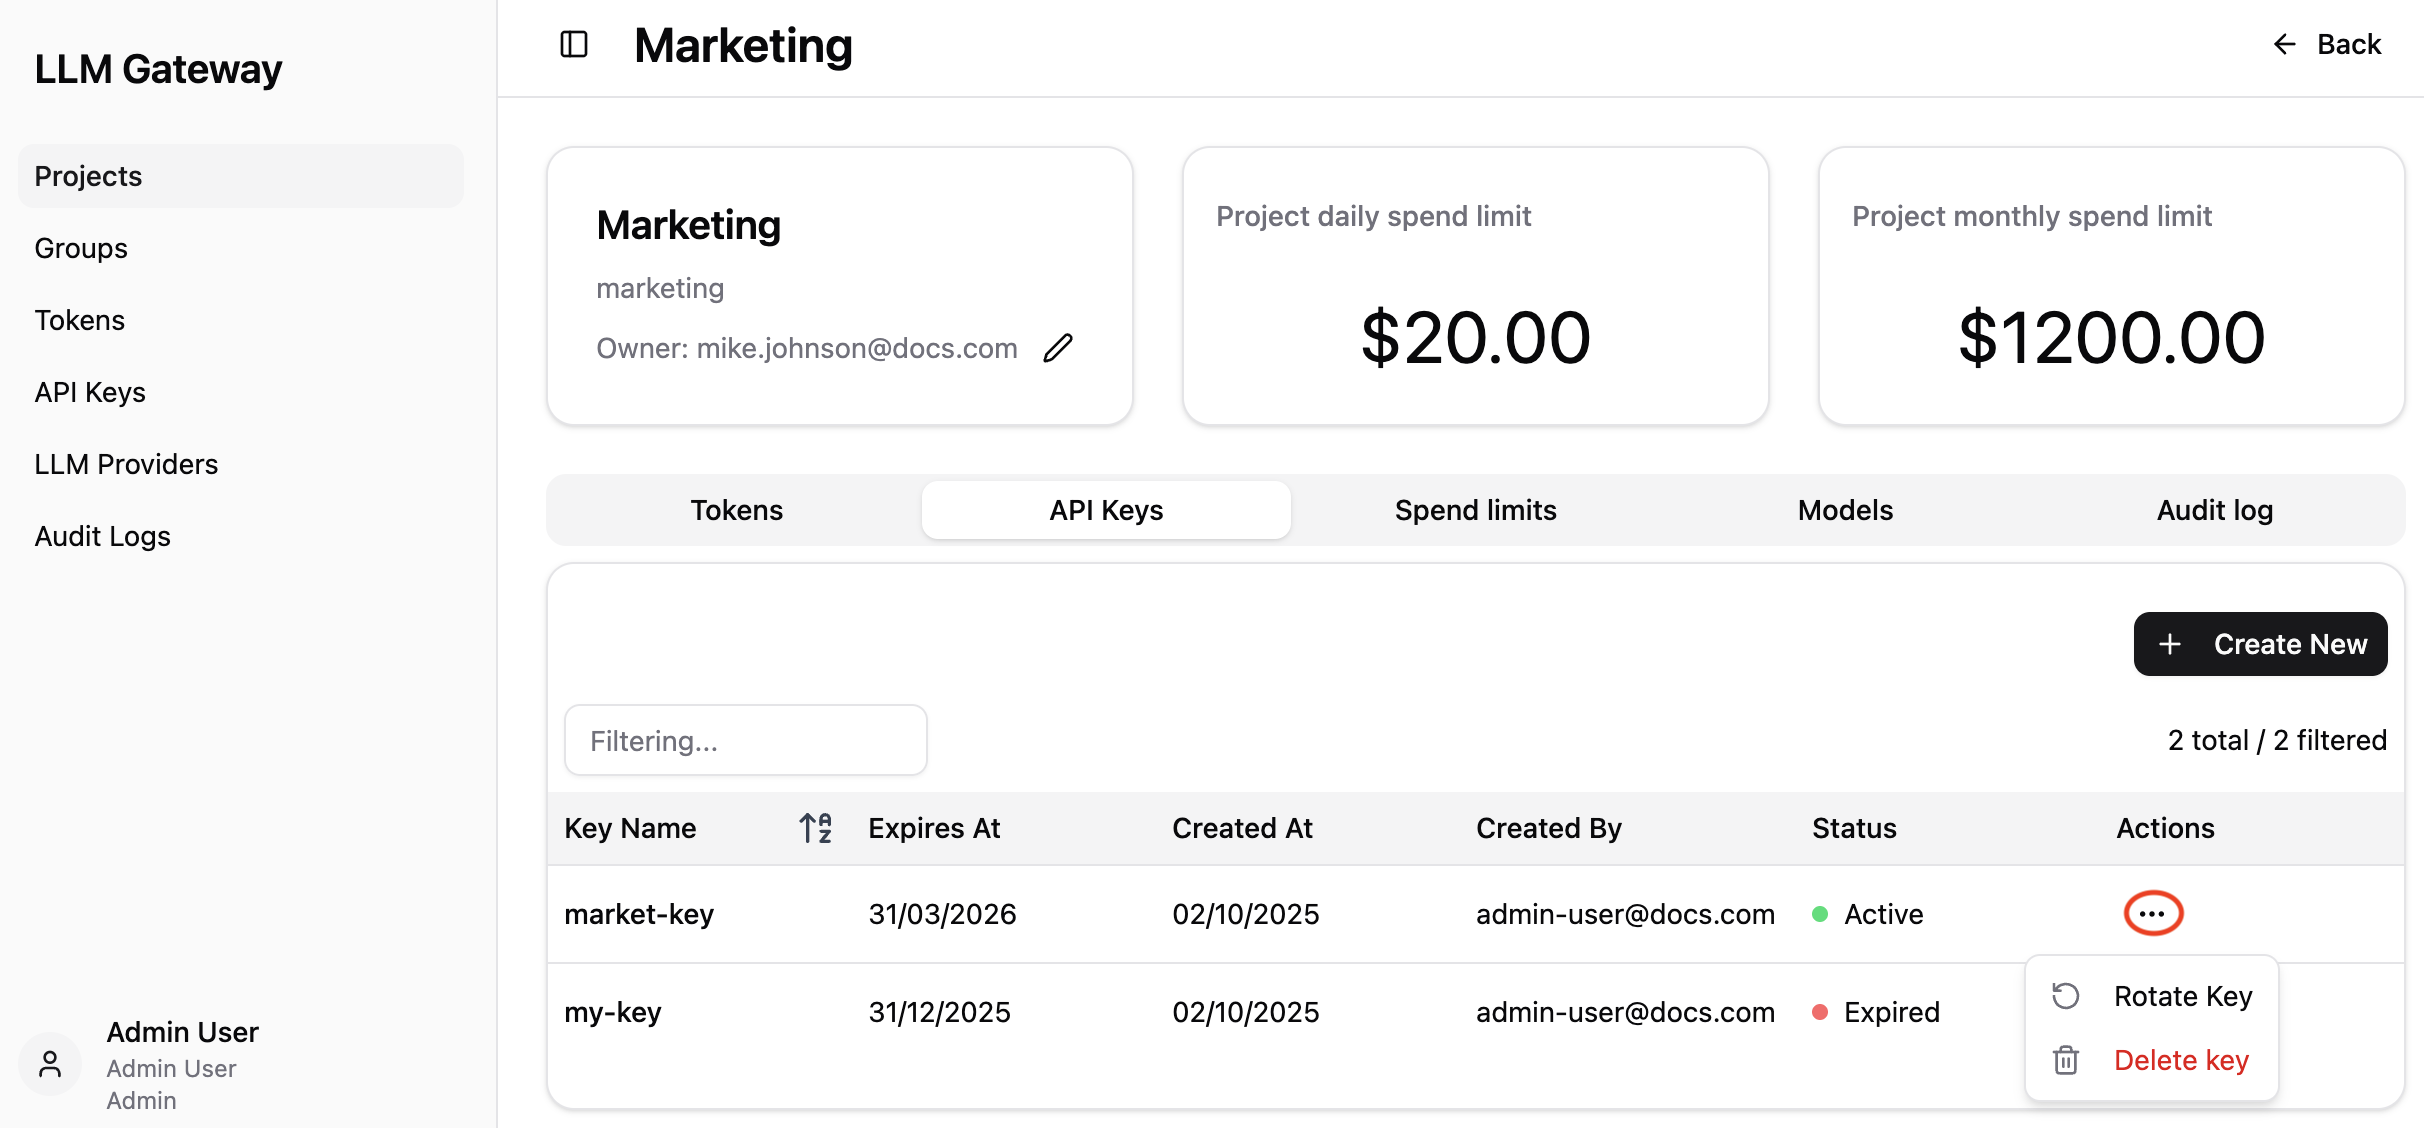
Manage API keys for programmatic access to the project:
- View all API keys connected to the project with detailed information including key names, expiration dates, and creation details,
- Monitor key status and ownership for security tracking,
- Create new API keys using the
+ Create Newbutton, this button redirects you to page explained in API Keys section. - Perform key management actions through the three-dot menu (highlighted in red circle):
- Rotate existing keys to renew the expiration date,
- Delete keys that are no longer needed.
Spend Limits Tab
The Spend Limits tab provides granular spending controls organized into two separate sections:
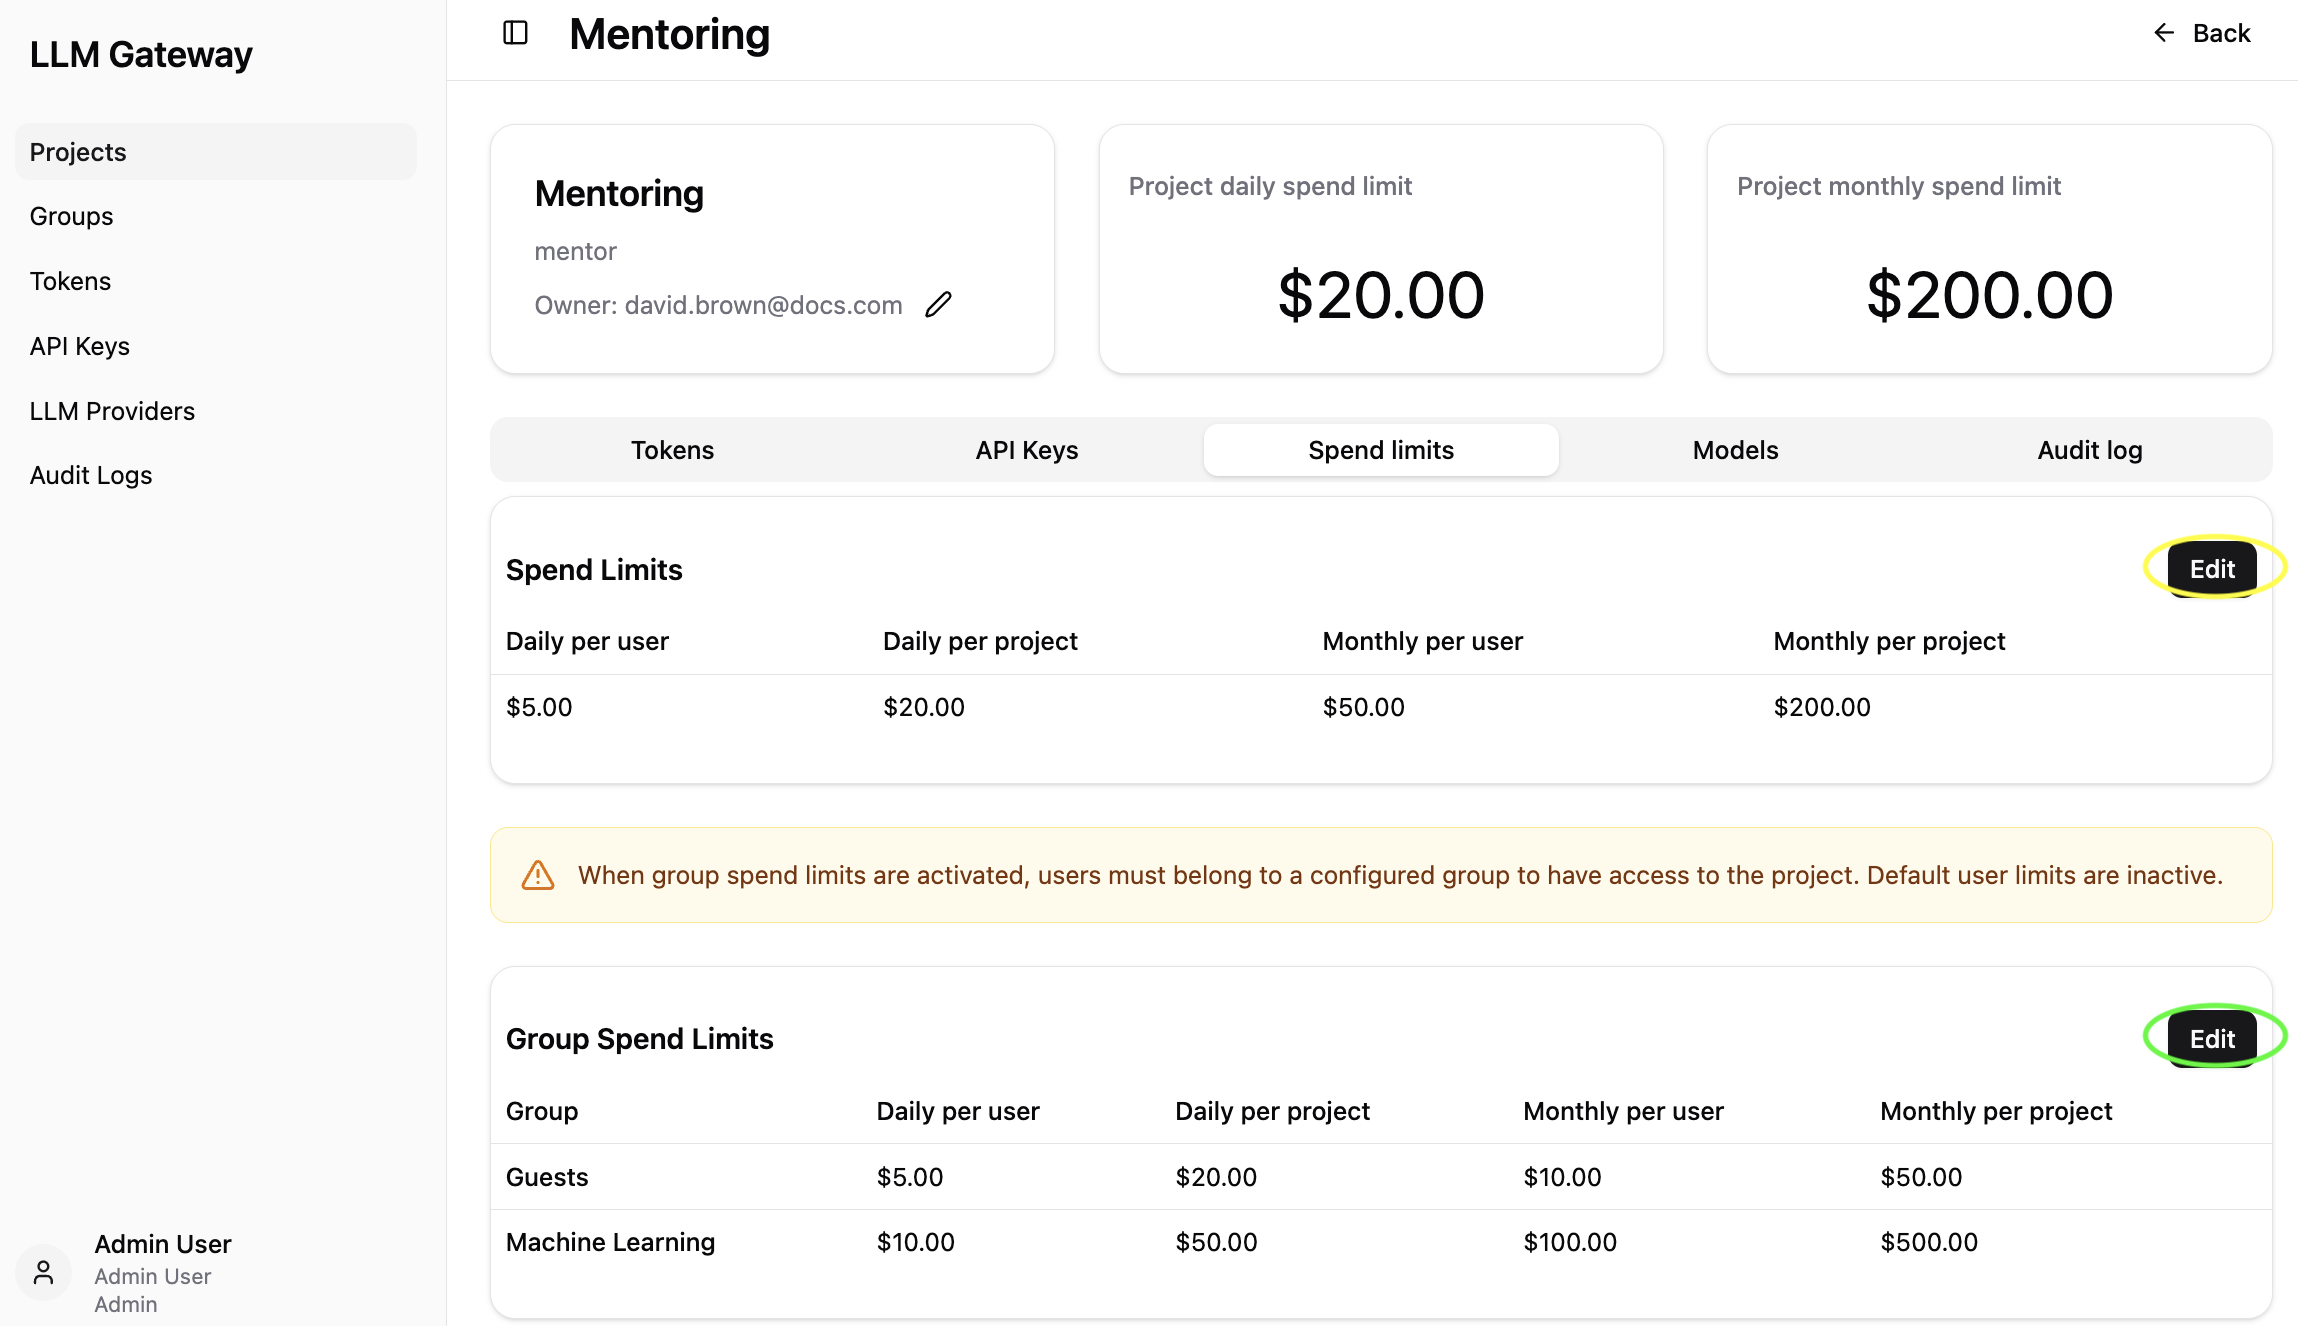
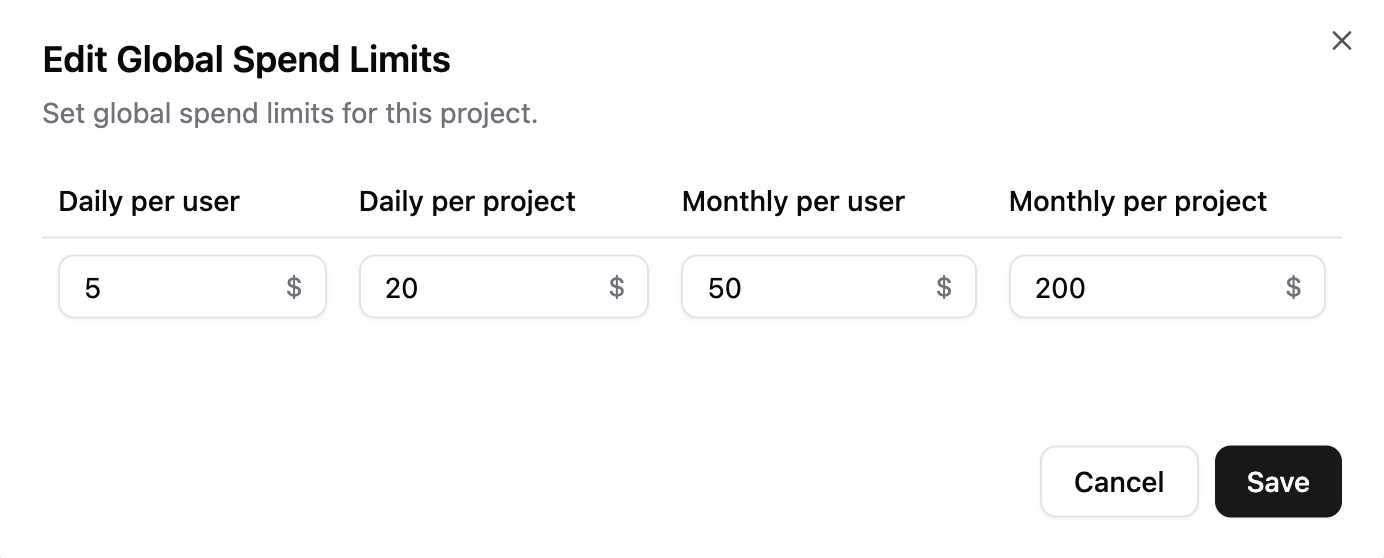
Spend Limits Section
Configure global spending limits that apply to all users and the project by default:
- View current daily and monthly spending limits per user and per project,
- Click the
Editbutton (highlighted in yellow) to modify these default limits, - The edit dialog allows you to update all four limit values simultaneously.
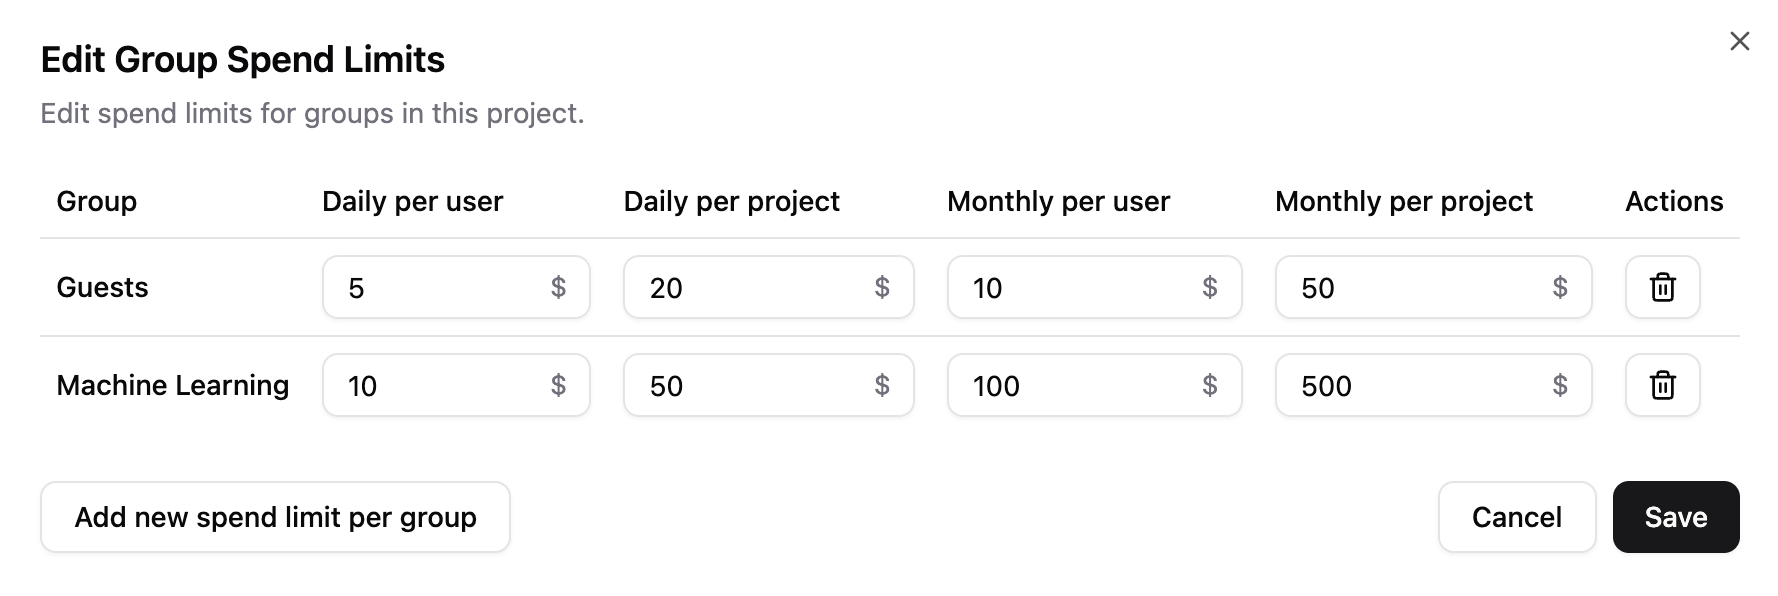
Group Spend Limits Section
Configure group-specific spending restrictions to control access and limits for different user groups:
- View a table showing all configured group spend limits with their respective daily and monthly limits per user and per project,
- Click the
Editbutton (highlighted in green) to manage group-specific limits, - The edit dialog displays all configured groups with inline editing capabilities and a delete option for each group,
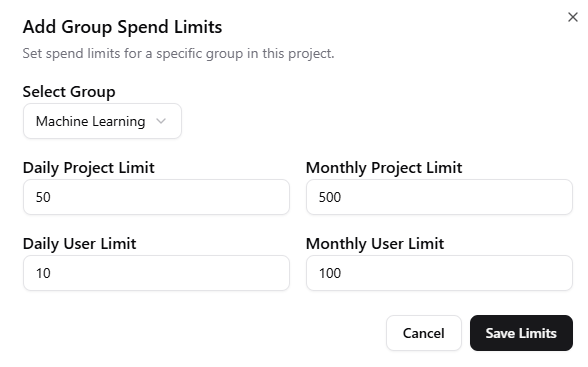
- Click
Add new spend limit per groupwithin the edit dialog to add limits for additional groups, - Groups must be already created in the system before they can be selected from the dropdown menu.
When adding a new group spend limit, you'll see a dialog where you can select a group and configure its specific daily and monthly limits for both users and projects.
⚠️ Warning: When group spend limits are activated, users must belong to a configured group to have access to the project. Default user limits are inactive.
Models Tab
Control which AI models are accessible for this project to manage costs and ensure appropriate model usage:
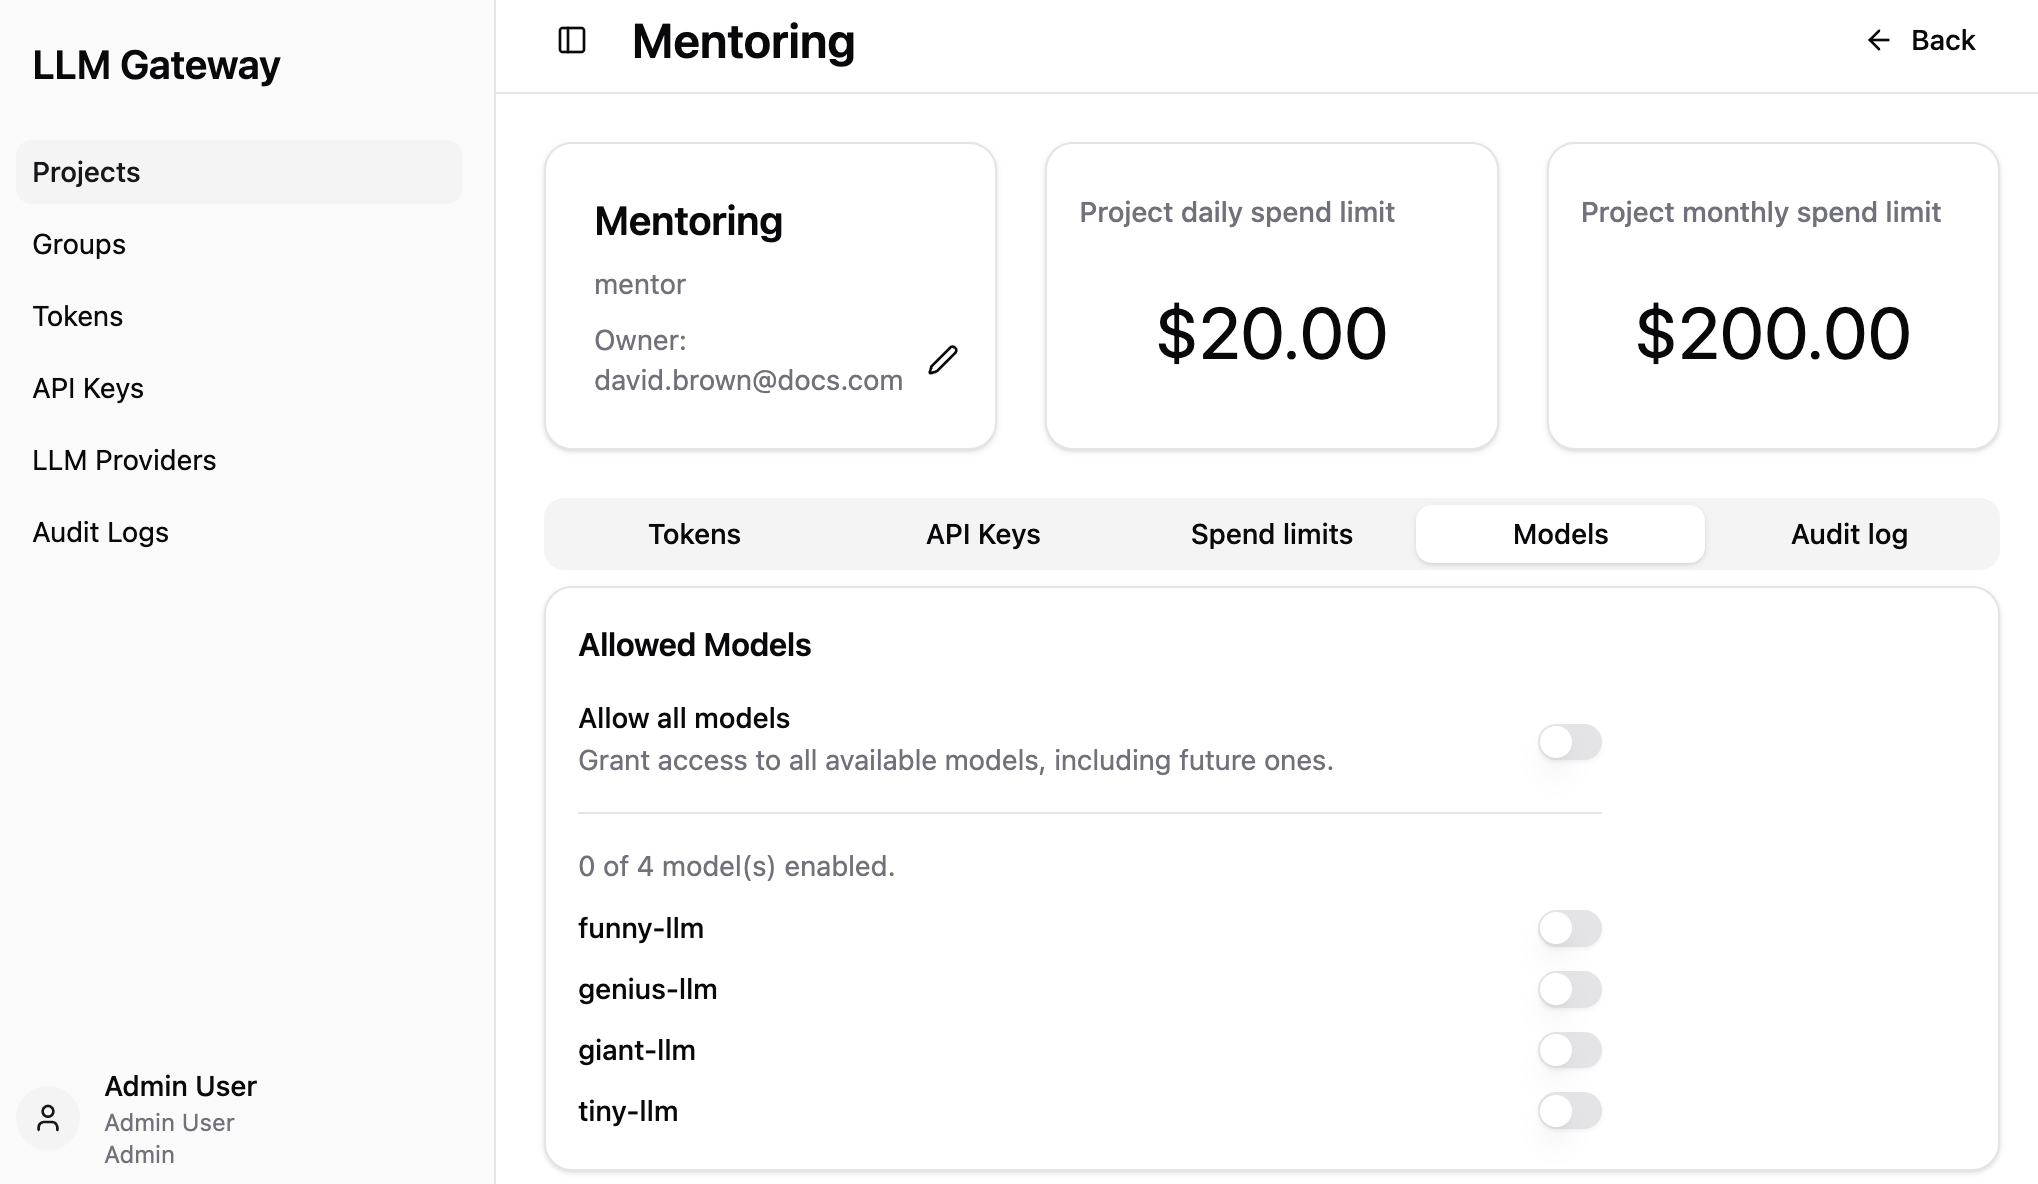
Allow All Models
By default, the Allow all models toggle is enabled, granting access to all available models including future ones:
- When enabled, users can access any model configured in the system.
Individual Model Selection
To restrict model access, disable the Allow all models toggle to reveal individual model controls:
- A list of all available models in the system appears with individual toggle switches,
- A status indicator shows how many models are currently enabled,
- Enable only the specific models you want to allow for this project,
- Only enabled models will be accessible to users working within this project.
Note: Model restrictions help control spending by limiting access to expensive or specialized models on a per-project basis.
Audit Log Tab
The Audit Log tab provides access to all activities and changes specific to this project. It offers the same comprehensive filtering and viewing capabilities as the global Audit Logs page, but filtered to show only entries related to the current project entity.
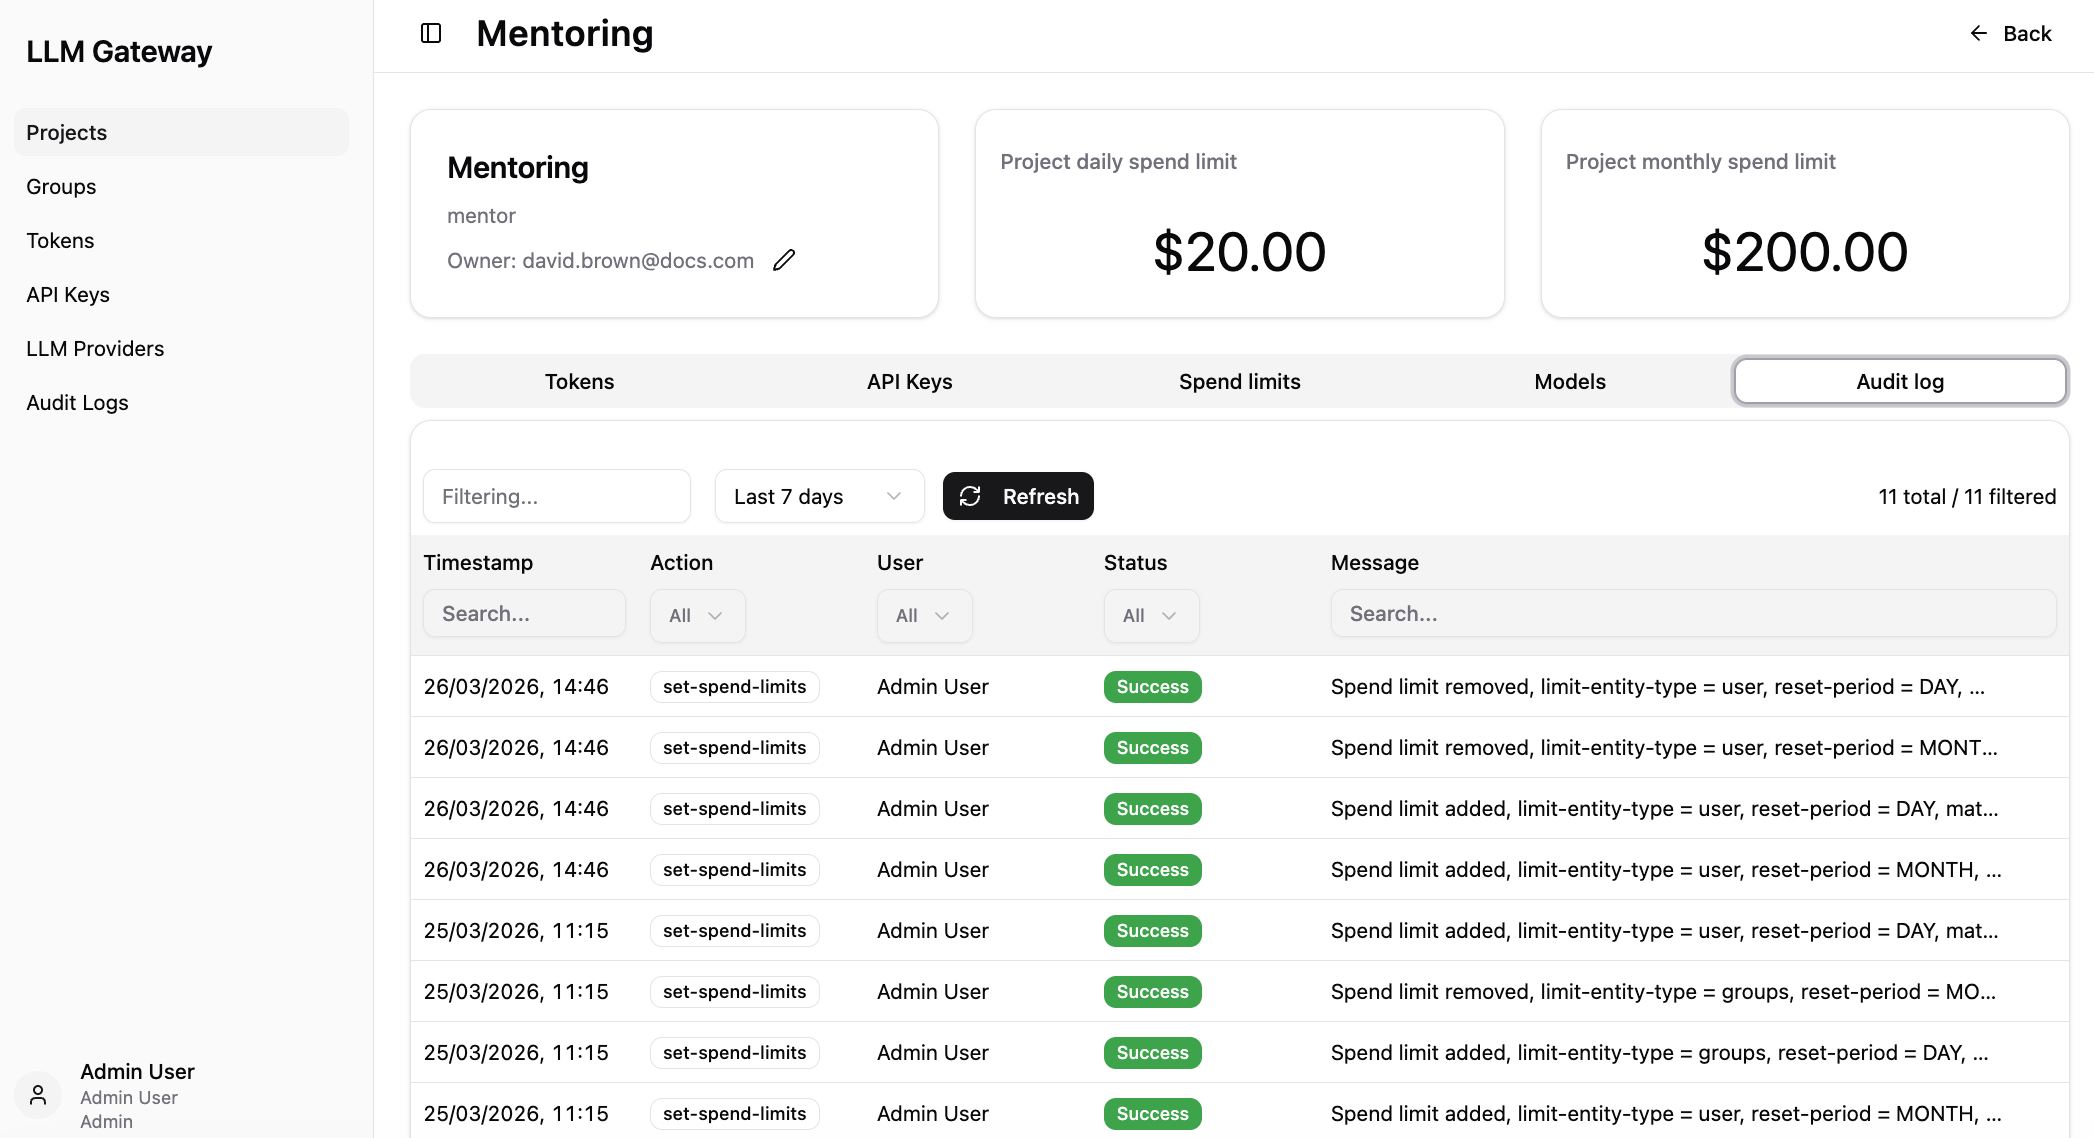
For detailed information about filtering options and audit log features, see the Audit Logs documentation.
Usage Tab
The Usage tab shows project-scoped spend and request volume so you can see how a single project is consuming the gateway over time. It applies the same time range picker pattern as the Home dashboard, but every widget is filtered to the selected project.
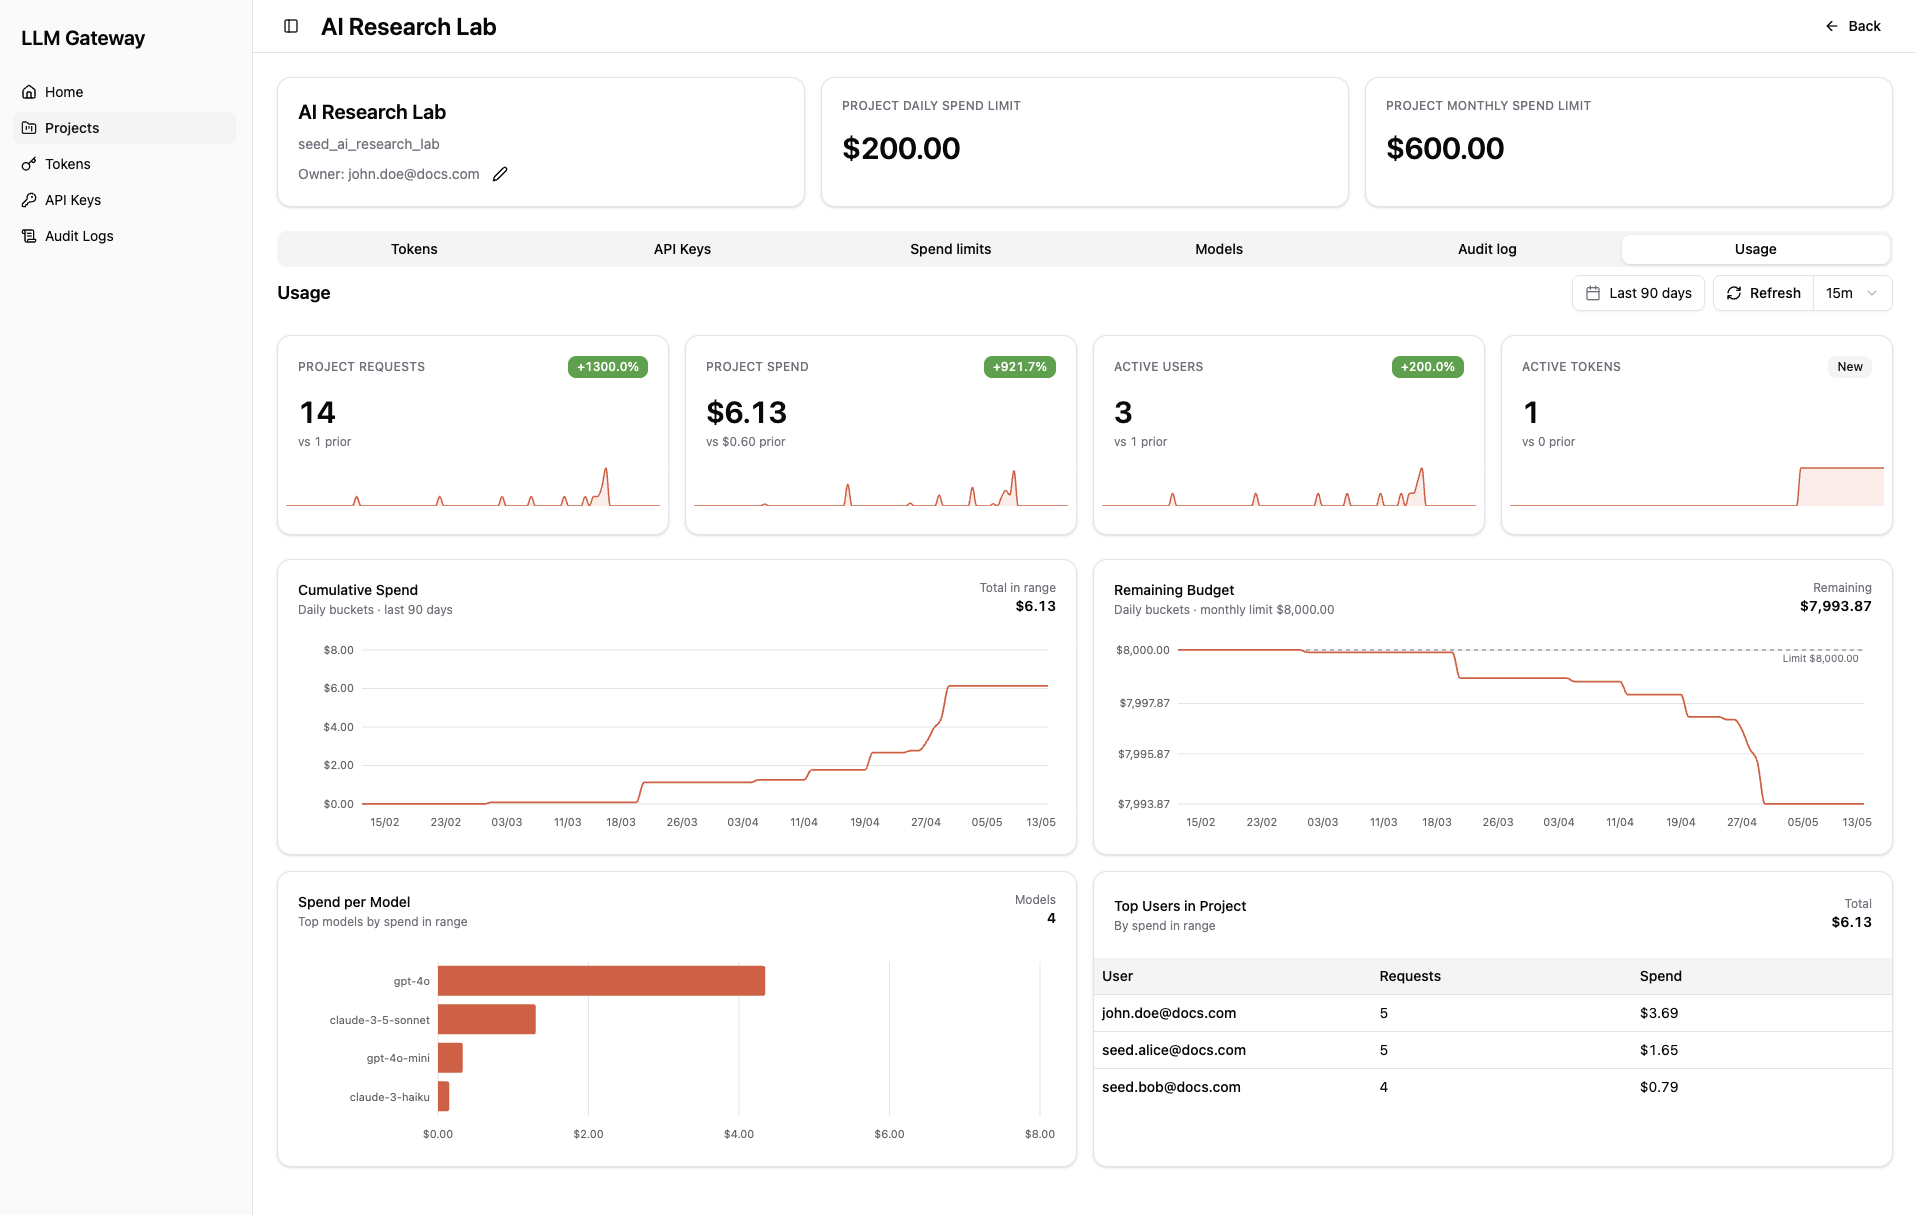
Use this view to validate that the project's spend stays within its configured limits and to spot traffic spikes that may warrant a model or limit adjustment.
Interaction Logging Tab
Required role: Admin, Super Admin, or the Project Manager who owns the project.
The Interaction Logging tab overrides the deployment-wide interaction logging defaults for this single project. The tab only appears when interaction logging is enabled in the configuration file.
It has three controls, each set independently:
-
Logging for this project - Whether requests tied to this project are logged,
-
Treat logs as sensitive - Whether this project's logs are marked sensitive,
- Log request and response body - Whether the full request and response bodies are stored (in addition to metadata).
Each control offers three choices:
- Inherit - Use the deployment-wide default. The option shows the current default value, for example "Inherit (currently On)",
- Enabled - Force the setting on for this project, ignoring the default,
- Disabled - Force the setting off for this project, ignoring the default.
Changes apply immediately and are recorded in the project's audit log. Setting all three back to Inherit clears the override, so the project follows the deployment defaults again.
Note: Body logging for a project only takes effect when body storage is also enabled at the deployment level (
interaction_log.body.enabled: true). See Interaction Logs configuration.
This flexible project structure allows organizations to organize their LLM usage according to their specific business needs and governance requirements.